Welcome to our updated introduction to coffee basics for 2026. Whether you’re a curious beginner or a home barista sharpening your routine, this friendly guide walks through practical steps to brew better cups at home. Start hands-on with a simple pour-over recipe below and build confidence quickly.
If you want to learn java as a coffee lover, you’re in the right place. Here, “Java” celebrates both the beloved coffee culture and the idea of learning a craft. This java tutorial focuses on everyday brewing techniques, essential equipment, and clear tasting notes so you can develop reliable routines and join a welcoming coffee community.
We make learning approachable by breaking down core variables—grind size, brew time, water temperature, and dose—into small, practical steps. You’ll learn how each factor affects flavor, build repeatable processes, and be ready to experiment and refine recipes using simple tasting data.
Key Takeaways
- Understand the core brewing fundamentals—dose, grind, water, and time—so you can control flavor.
- This approachable introduction is designed for coffee learners in 2026, helping the steady development of tasting skills and dependable routines.
- Follow a clear, step-by-step roadmap to choose equipment, set up your brew platform, and practice reliably.
- Gain confidence to make and evaluate your first cups, using simple data-driven tasting notes to improve every brew.
- Build a foundation to explore more advanced drinks and applications like espresso and milk-based recipes as you grow.
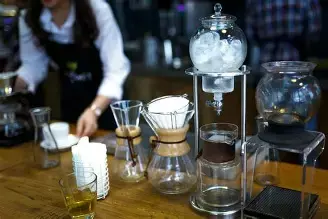
What you’ll need: a burr grinder, a kitchen scale, a gooseneck kettle, and a dripper (see our recommended starter gear to shop on Amazon).
Why Java (Coffee) Is a Great Choice for Beginners
Many people wonder why java keeps winning newcomers’ hearts — and for this coffee site that means both the approachable bean and the way beginners learn a craft. As an easy starting point, Java (the bean) adapts well to multiple brew techniques, while the programming analogy reminds us that clear fundamentals and long-term practice lead to reliable results.
Understanding the Versatility of Java
A versatile bean can shine across different brewing platforms: a well-roasted Java coffee may show bright acidity and floral notes in a pour-over, then reveal deeper caramel or chocolate tones when brewed as espresso. Try small tasting flights to observe how the same bag behaves on different equipment and record what you find.
Starting with Java (the coffee) gives you flexibility: practice single-cup pour-overs at home, scale up to batch brews for guests, or dial in concentrated shots if you move toward espresso gear. That practical adaptability mirrors why many developers appreciate the programming Java: it supports varied applications, from simple projects to larger enterprise-scale work — the comparison simply highlights versatility and growth potential.
- Strong community of producers, roasters, and home brewers who share tasting notes and recipes.
- A wide set of brewing tools (burr grinders, gooseneck kettles, drippers) that make consistent results accessible for beginners.
- Clear pathways to grow skills—home brewer to café operator—similar to career growth in tech.
The Role of the Equipment Layer
In programming the java platform and JVM let code run across systems; in coffee, think of the grinder and brewer as the layer that connects raw beans to your cup. Quality equipment helps manage temperature and extraction so your recipes are more repeatable; learning that layer improves reliability and speeds development of your palate and routines.
Practical CTA: try a small tasting flight this week — pick a sampler of three roast levels (affiliate sampler link) and compare them across two platforms (pour-over and French press). Note flavor changes, record numbers (dose, grind, time), and use those observations to refine your preferred recipes.
Preparing Your Brew Station
Creating a strong base starts with a well-organized brew station — in this coffee-focused guide that means a dependable countertop setup where workflow and safety come first. Before you make your first cup, confirm your workspace, equipment, and basic technique are ready. This initial setup is essential for steady development of your brewing skills and consistent results.
Your Essential Starter Kit
The first practical step in this java tutorial is assembling the right tools. For home brewing, that means a burr grinder, a reliable kitchen scale, a gooseneck kettle (for pour-over control), and a dripper or basic espresso setup that matches your goals. Think of this core kit as everything that turns raw beans into repeatable cups: grinder, scale, kettle, and a brewing device.
When buying gear, keep simple rules in mind: choose a conical or flat burr grinder rather than a blade grinder for consistent particle size; select a kettle with good temperature control if you plan to pour-over; and start with a manual dripper if you want to learn extraction before investing in automatic machines. Set each item on a stable counter with easy access to water and power so your workflow is smooth and safe. (Shop a recommended beginner bundle on Amazon.)
“The secret of getting ahead is getting started.”
Configure Your Repeatable Settings
After your gear is in place, decide and record your brew “environment variables” — the repeatable settings that let you reproduce a great cup. Key variables include grind size, dose, water temperature, and total brew time. Tuning these is the fastest path to consistent results.
Quick checklist to test your station:
- Zero your scale and measure dose precisely (example starting point: 16 g coffee : 240 g water).
- Preheat dripper and cup so temperature loss is minimized.
- Dial grind until a 2:30–3:00 total brew time gives a balanced extraction for your recipe.
- Record each run in a brew log (dose, grind setting, water temp, time, tasting notes) so your data helps you repeat and improve.
Safety tip: handle hot water and electrical gear carefully, keep cords clear, and allow kettles and machines to cool before cleaning. Once your tools and “environment variables” are tuned, you’ll be ready to use java-style practice: measure, record, and refine — and join the wider coffee community sharing recipes and tasting notes.
Selecting the Right Integrated Development Environment
Choosing the right workspace is key to mastering your coffee routine. The right equipment, layout, and workflow can improve results and make daily brewing easier. For beginners a reliable station helps you learn faster and reproduce great cups consistently.
Note: the embedded video has been removed from interactive form to avoid JavaScript usage; consider linking to a static tutorial thumbnail or transcript instead.
Comparing IntelliJ IDEA and Eclipse (Espresso vs. Pour-Over)
Think of a high-end espresso machine paired with a precision grinder as the polished, feature-rich option: fast, consistent, and designed to minimize variables. A modular pour-over setup—scale, gooseneck kettle, and dripper—offers flexibility and a hands-on learning path that helps you understand extraction fundamentals. Both approaches have strengths; pick the one that matches your goals and budget.
| Feature | Modern Espresso Setup | Manual Pour-Over Setup |
| User Interface | Digital controls / intuitive | Analog / tactile |
| Performance | High consistency | Moderate — skill-dependent |
| Best For | Daily espresso drinkers / small teams | Home brewers / experimenting |
When choosing your station, think about troubleshooting flavor and organizing recipe cards. High-end machines often streamline workflow and reduce variables (helpful when serving a small team or customers), while manual setups teach you the details of extraction and give tighter flavor control.
Setting Up Your First Project in Your Chosen IDE
After you have your gear, start your first brew project and keep everything organized so your repertoire grows without confusion.
- Set a dedicated brew area on a stable counter with clear access to water and power.
- Choose equipment that fits your goals and calibrate it (grinder settings, kettle temp) for your first recipe.
- Name recipes clearly and note parameters (dose, grind, temperature, brew time) so you can reproduce them reliably.
- Run a test brew, adjust until the cup matches your target, then save the final parameters.
Learning to use your equipment’s interface and features pays off: consistency is key when exploring different platforms and methods. As you grow, you can expand into larger workflows — for example batch brewing for events or simple menu planning for small desktop-style cafe operations. If you want product recommendations, check our recommended espresso setup and pour-over kit (affiliate links) to compare features and price points.
Writing Your First Coffee Recipe
Making your first cup is the milestone that turns curiosity into skill. This hands-on section walks you through a simple, repeatable pour-over recipe so you learn by doing—much like running a tiny, well-scoped program. The aim is a clear workflow that builds confidence and gives you a reliable baseline to improve from.
Understanding the Recipe Structure
Think of a recipe as a blueprint (similar to a class in programming). It lists ingredients (beans, water), tools (grinder, kettle, dripper), and ordered steps (weigh, rinse, bloom, pour). A tidy recipe makes it easy to tweak one parameter—like grind—without losing the rest of the method, just as modular methods keep code maintainable.
When you write a recipe, include clear inputs and expected outputs: dose, grind setting, water temperature, brew time, and the tasting profile you expect. That structure helps you compare runs and develop repeatable results.
The Start Step and Recording Results
Every recipe needs a clear starting step (the equivalent of a program’s entry point). For a pour-over, the start is: weigh beans, rinse filter, bloom, then pour. After brewing, “printing to the console” becomes tasting and recording results. Capture quick, data-driven notes on acidity, body, sweetness, and any off-flavors so you can iterate.
“The only way to learn a new programming language is by writing programs in it.”
Follow this beginner recipe and repeat it until the process becomes second nature.
- Recipe (Introductory pour-over): 16 g coffee : 240 g water, 93°C water, bloom 30 s (30 g), then pour steadily for a total brew time ~2:30–3:00.
- Use a scale and precise thermometer; record data—dose, grind setting, water temp, and brew time—so you can reproduce and refine.
- Brew, taste, log notes, then change only one variable at a time and repeat.
If you prefer alternate methods: try a French press at a 1:15 ratio (e.g., 20 g : 300 g) with a 3–4 minute steep, or a concentrated espresso-style recipe depending on your equipment. For tools, consider a reliable scale, a gooseneck kettle, and a burr grinder — check our recommended starter kit to buy these on Amazon.
Learning by doing—brew, taste, change—mirrors how programmers learn by writing java programs. Keep concise recipe cards for each successful run so your collection of tested programs (recipes) grows into a useful library you can reuse and share.
Mastering Measurements and Variables
To build reliable brews you need consistent measurements and good record-keeping. Precise measurement and note-taking are the foundation of repeatable results—much like clear syntax makes programming predictable. This section converts programming concepts into practical, coffee-first rules so your recipes behave the same way each time.
Core Units and When to Use Them
Think of primitive data types as the basic units you use when you brew: grams for coffee dose, milliliters for water, degrees Celsius for temperature, and seconds for time. When you record a recipe (a “variable”), choose the correct unit so measurements are precise and comparable. For example, weighing coffee in grams is far more reliable than using volume measures like tablespoons—choosing the right unit prevents inconsistent results.
Using precise units is essential for reproducible cups. Tracking dose in grams and brew time in seconds gives the resolution you need to tune extraction and compare runs across different sessions and platforms.
| MeasurementUnitWhat it describesExample | |||
| Dose | grams (g) | Coffee weight per brew | 16 g |
| Water | milliliters (ml) | Brewing water volume | 240 ml |
| Temperature | °C | Water temperature for extraction | 93 °C |
| Time | seconds (s) | Total brew/extraction time | 150–180 s |
Constants, Strings, and Recipe Headers
In programming we use strings for text and final constants for values that shouldn’t change. In coffee, tasting notes are your strings and constants are recipe parameters you lock in—like a target brew ratio you don’t change mid-test. Using a fixed constant (for example, a defined 1:15 ratio for a given test) helps you compare results cleanly and avoid error when adjusting other variables.
Practical tip: keep a short recipe header that lists constants (bean, roast date, ratio) and then record variable data (grind, water temp, time) for each run. Change only one parameter per test so you can isolate its effect—this methodical approach mirrors debugging in code.
Standardize your tools: use a precise scale, a reliable kettle with stable temperature control, and a consistent burr grinder. These choices reduce measurement noise so your experiments—adjusting dose, grind, or time—yield meaningful comparisons. Over time, disciplined measurements form a recipe library (a package of trusted methods) you can reuse and share.
Tasting Decision Rules (Practical Logic for Better Cups)
Great brewing depends on smart, evidence-based decisions. After tasting a cup you’ll often know a change is needed—these simple decision rules help you respond to different inputs (bean, roast date, grind, dose) so your process produces the flavors you want.

Using If-Else Rules for Quick Adjustments
Run a short sensory checklist after each brew. If the cup is sour, try a finer grind or a slightly longer brew time; else if it’s bitter, try a coarser grind or a shorter extraction. Chain checks for multiple issues (for example: if acidity too high → grind finer; else-if body thin → increase dose) so your tasting logic stays clear and repeatable.
Example actionable adjustment: if under-extracted (sour), reduce grind by about 0.25–0.5 g on your grinder step setting or increase total brew time by 10–20 seconds; if over-extracted (bitter), go 0.25–0.5 g coarser or shorten brew time by 10–20 seconds. Verify these increments on your own grinder—numbers vary by model.
Using Presets (Switch) for Repeatable Menus
When you serve multiple people or run a small tasting menu, use preset recipes: switch on method { pour-over → recipe A; French press → recipe B; espresso → recipe C }. Presets reduce decision fatigue and improve consistency when you or your team switch between methods.
| FeatureIf-Else (Dynamic Adjustments)Preset (Switch) | ||
| Best Use Case | Fine-tuning after tasting (nuanced problems) | Choosing distinct brew methods or fixed recipes |
| Readability | Good for a few checks | Excellent for many discrete choices |
| Performance | Quick for simple fixes | Optimized for consistent menu-style brewing |
| Flexibility | High — adjust on the fly | Moderate — fixed parameters |
Practical tasting checklist: evaluate acidity, body, sweetness, and aftertaste. Use simple A/B testing—change one variable at a time and record the data (dose, grind, time, temp, and tasting notes). That methodical approach mirrors debugging in programming: isolate the variable that matters, observe the outcome, and iterate until the cup matches your target.
Quick CTA: want a compact tasting kit? Consider a set of tasting spoons, sample cups, and a small timer (affiliate links) to run clean flights and collect reliable data for your recipe library.
Repeatable Routines for Consistent Flavor
Consistency is everything in brewing: repeating the same actions reliably leads to repeatable flavor. Just like programming uses loops to run tasks multiple times, smart coffee routines use repeatable steps and timed sequences so each cup behaves predictably.
Planned Repeats (For-style)
A planned-repeat approach works when you know how many identical brews you need — for example, pulling a series of the same espresso shots or making several pour-overs for guests. Use a counter (number of cups) and run the exact sequence each time: weigh, grind, bloom, pour, and time each run so results are comparable.
Tasting Flights (For-Each-style)
Use a consistent protocol when tasting a lineup of beans or roast samples. Treat each sample the same way (same dose, grind, and timing) so you compare flavor differences without introducing procedural noise. This “for-each” testing keeps the focus on the beans and simplifies conclusions.
Iterative Tuning (While / Do-While)
Sometimes you won’t know how many attempts you need to hit your target. A while-style approach helps: keep adjusting grind, dose, or time while the cup doesn’t meet your goal. A do-while approach ensures you always try at least once—brew, taste, then decide whether to repeat.
Stop rule: avoid infinite repetition. Re-brewing wastes beans and time. Set a sensible default limit (for example, three iterations per test change) and record measured time and tasting notes to decide when to stop.
| Loop TypeBest Use CaseHow it Runs | ||
| For-style | Repeat fixed number of identical brews | Pre-defined count (repeat N times) |
| For-each-style | Tasting flight across multiple beans/samples | Same protocol for each item |
| While-style | Tune until target flavor reached | Check condition before repeating |
| Do-while-style | At least one test brew, then reassess | Run once, then decide to repeat |
Practical test plan: pick one variable to test (e.g., grind), select a sensible range of changes, and run three repeats per setting. Example: test three grind settings, brew each setting once (or repeat each three times for more data), log the time, dose, and tasting notes, then analyze which setting consistently matches your target. This measured approach turns adjustments into an experiment and gives useful results for future methods and other applications like batch planning or recipe sharing.
Quick CTA: consider a tasting kit (sample beans, small cups, a timer) to run clean, repeatable tests — it’s an easy affiliate-friendly buy that speeds your learning and helps gather reliable data.
Organizing Recipes with Reusable Methods
As your recipe collection grows, structure becomes essential. A single messy note is hard to reproduce—treat methods as reusable brewing routines: named, tested steps you can call again and expect the same result.
Defining Methods and Parameters
A method is a named routine that performs a specific action—for example, a pour-over routine that weighs, blooms, and pours. Methods keep your main process clean and focused. When you design a routine, use clear parameters so it’s flexible: dose (grams), grind size, water temperature, and brew time become the inputs you adjust.
Example: a pourOver(dose, grind) method lets you reuse the same steps with different values to see how each parameter affects flavor. This modular approach mirrors how developers write code to scale projects while keeping things maintainable.
Return Values and Scope (What Each Method Produces)
In programming, methods declare return types; in brewing, the “return” is the cup, a batch, or a tasting profile. Be explicit about what each routine outputs so workflows chain together cleanly—do you expect one cup, three samples, or a tasting note entry?
Scope matters: temporary steps (a rinse or a short timer setting) should remain local to that brew so they don’t affect other recipes. That isolation prevents accidental carryover of settings and keeps each method predictable.
| ComponentPurposeKey Benefit | ||
| Parameters | Input values (dose, grind, temp) | Flexibility to tune flavor |
| Return | Brewed cup or tasting profile | Clear outcome expectations |
| Scope | Local step variables | Prevents cross-recipe errors |
Practical step: create printable recipe cards (affiliate templates) and store them in a small binder or a cloud folder. Define a few core methods—for example, pourOver(dose, grind), pressBatch(dose, time)—and save them as recipe cards or short PDFs. Over time these become your personal library of dependable routines you can share with others or adapt across different platforms and equipment interfaces.
Modeling Your Coffee System (Simple Object Thinking)
Complex workflows are easier to manage when you break them into clear, reusable pieces. The programming concept of object-oriented programming maps neatly to coffee: thinking in objects and templates helps you design repeatable recipes, catalog inventory, and scale processes without losing clarity.

Classes as Templates — Example: Bean
Think of a class as a template: a “Bean” template lists the fields that describe a coffee. A practical Bean template might include: origin, producer, roast date, roast level, varietal, tasting notes, and recommended brew ratio. Each bag you buy becomes an object instance with those specific values — a concrete item you can brew, log, and share.
Sample Bean template (fields to capture): origin, farm/producer, roast date, roast level, flavor notes, recommended ratio, and storage notes. Keeping these structured fields in a simple spreadsheet or printable card makes inventory and recipe matching fast and consistent across different platforms (menus, online listings, or a small POS).
Constructors and Initial State
Constructors set initial state. For a recipe, the constructor is the starting setup: dose, grind, and temperature that define how the brew begins. Using a defined constructor ensures each new brew starts from a consistent baseline and reduces variability when you or a teammate reproduce a recipe.
Encapsulation — Protecting Core Details
Encapsulation means keeping internal details controlled. In coffee practice that could mean storing roast-date and producer details in one place while exposing only the tasting notes and recipe steps on customer-facing menus. Encapsulation prevents accidental changes to core data and helps maintain data integrity over time.
| ConceptPurposeKey Benefit | ||
| Classes | Template (bean profile / recipe) | Reusability and consistency |
| Objects | Concrete instances (a bag or brewed cup) | Real-world representation |
| Constructors | Initialize state (dose, grind, temp) | Consistent starting point |
| Encapsulation | Hide internal details | Data integrity and reliability |
Practical next steps: create a simple “Bean” card or spreadsheet to capture the fields above, then build a small collection of recipe cards that reference those beans. If you run a small operation, you can export this as a printable package of recipes or upload them to a basic desktop POS. This object-based mindset works across different languages of documentation and helps you scale from home experiments to sharing recipes with friends or customers.
Troubleshooting: Diagnose and Recover Fast
No brew is perfect every time — knowing how to diagnose and recover from problems separates a hobbyist from a confident brewer. Just as developers handle java exceptions to keep apps stable, home baristas use short troubleshooting routines to protect performance, preserve beans, and keep users (guests or yourself) satisfied.
Mastering a concise recovery routine means your setup stays reliable and you get consistent results even when something goes wrong.
The Try-Catch-Finally Pattern for Brewing
Apply the familiar programming pattern to coffee: try your planned recipe; if the cup tastes off, catch the symptom and apply a corrective action; then in finally always clean and reset equipment so you don’t carry problems forward. This loop prevents wasted beans and preserves gear.
Example flow: try the recipe → catch sourness (under-extraction) → adjust grind/time and retry → finally, rinse or backflush the group head and log the result.
| ProblemLikely CauseRecovery Strategy | ||
| Sour / under-extracted | Grind too coarse or brew time too short | Finer grind (small step) or increase brew time by 10–20s; retaste |
| Bitter / over-extracted | Grind too fine or brew time too long | Coarser grind (small step) or shorten extraction by 10–20s; retaste |
| Weak / thin cup | Insufficient dose or low water temperature | Increase dose (1–2 g) or raise water temp ~2–4°C; retaste |
Best Practices for Debugging Your Brew
Use “breakpoints” during a brew — pause at the bloom, check grind, or measure flow — to observe what’s happening. Keep a concise brew log (date, bean, dose, grind, temp, time, tasting notes) so you have reliable data to compare and avoid repeating mistakes.
If a fix doesn’t work, revert the last change and try a different adjustment. These calm, methodical steps mirror good debugging habits and lead to more predictable cups.
Quick CTA: before discarding beans, run this short checklist: confirm dose and grind, measure water temperature, and try one targeted adjustment. Consider a compact troubleshooting kit (cleaning supplies, small brush, backflush tool, and a reliable thermometer) to keep equipment in top shape — a small affiliate purchase that protects gear and improves long-term security of results for your users.
Essential Resources to Advance Your Coffee Skills
Growing your skills means pairing structured study with hands-on practice. For coffee lovers, that means using trusted references, joining active communities, and building small projects that turn theory into repeatable recipes. Consistent practice accelerates your development as a home barista and helps you apply techniques across different brewing platforms.
Authoritative References and Community Forums
Just as programmers rely on official docs, coffee learners benefit from authoritative sources: roaster brew guides, Specialty Coffee Association (SCA) materials, and well-regarded books on extraction and sensory evaluation. Keep a short bookmarked list of these resources for quick deep dives into roast development, grind science, and tasting methodology.
Active community forums are invaluable for troubleshooting and recipe ideas. Recommended places to learn and ask questions include Home-Barista, Reddit’s r/coffee, and roaster discussion groups. Participating in these communities helps you exchange tasting notes, get feedback on recipes, and learn best practices from experienced brewers — the same collaborative spirit that helps people share knowledge across different languages of explanation.
Small Projects That Solidify Learning
Theory is useful, but practical application cements learning. Start with focused, achievable projects: design a tasting flight of three roast levels, build a 3‑recipe rotation (pour-over, French press, espresso), or document a signature recipe and iterate. Treat each brew like a mini project—record parameters, collect tasting data, and refine.
Try a 30-day habit: practice 3–4 focused brews per week, log results, and tweak one variable at a time. Use simple tools (scale, grinder, kettle) and keep brief notes so improvements are driven by measurements. At the end of each week, review your data to spot trends and decide the next variable to test.
Resource checklist (quick): recommended beginner books, SCA articles, a starter gear shopping list (scale, burr grinder, gooseneck kettle, dripper), and a short tasting-log template. For those running small operations or integrating menus into websites, these same resources support simple menu exports and basic web applications (online menus or recipe pages).
CTA: download our printable 30‑day brew calendar and tasting-log template (affiliate link) to turn learning into a habit — use it with sampler packs or roaster subscriptions to accelerate steady progress.
Conclusion
Learning the basics of brewing is just the start of an exciting journey. This guide covered the core steps to help you feel confident with Java as a coffee concept and with practical brewing techniques: setting up your station, following simple recipes, tasting methodically, and refining your approach.
For beginners, improving your brew—much like programming—requires regular practice and curiosity. Try small projects (a 3-recipe rotation or a tasting flight), log your results, and treat each brew as an opportunity to learn. Even tiny adjustments can produce meaningful improvements over time.
The effort you put into developing these routines opens more possibilities: better cups at home, sharing recipes with a wider community, or moving toward part-time service or small-scale menu development. Brew today, note one tweak, and come back tomorrow to improve—this is how you reach the end of one learning loop and start the next.
Ready to get started? Shop our recommended beginner gear bundle (grinder, scale, gooseneck kettle, dripper) on Amazon and download a printable brew-log to track your development (affiliate links).